Have a seat...let's catch up!!
- Rae Fleming

- Aug 16, 2021
- 2 min read
Hello! I hope everyone is having a great summer! I'm not making excuses, but this has been a busy summer for me: moving my folks to town; keeping up with baseball schedules; running to hockey clinics; a working teenager; starting a new job; raising two teenagers - one of which now wants the car all the time! I'm exhausted physically and mentally! You??
Let's have a seat, rest and catch up! I'm thrilled to have partnered with the Habitat for Humanity Restore again on this SUPER easy DIY! Nothing is quite as easy as reupholstering a simple chair. I found this mid-century modern gem for $5 at the New Brighton HFH store!

Supplies:
>Chair
>Staple gun (& staples)
>New upholstery
>Sandpaper (optional)
>Stain/paint (optional)
>Screwdriver
Directions:
1. Find a chair you LOVE! Well, LOVE and needs a facelift! I LOVE this one from the Restore, but it was perfect as is! The Restore has so many chairs to choose from: many sets as well as singles! $5 people!!!!
2. First, separate the seat from the chair using a screwdriver.
3. Remove the upholstery from the seat (a flat screwdriver works well to remove the staples!). My seat just happened to reveal a nice, clean cream-colored upholstery. :) Not my vision for this DIY, however! Mr. Witherspoon (aka Reese) was very curious about the buzzing project!
4. Buy enough fabric (duck cloth or upholstery fabric) to cover the seat. This chair will be for my daughter's desk - she wanted green....and she got it! Boom! I ended up getting a little less than a yard (on sale at Hobby Lobby!). Use the old upholstery to guarantee you get enough.
5. Trace the old fabric onto the new fabric and cut.
6. Lay the seat on the newly cut fabric and staple. Don't pull too tightly otherwise, it'll make dents and pucker. Make folds and overlap as needed to not create wrinkles and uneven upholstering. It's a bit like wrapping the corner of a gift. It takes a bit of trial and error at first.
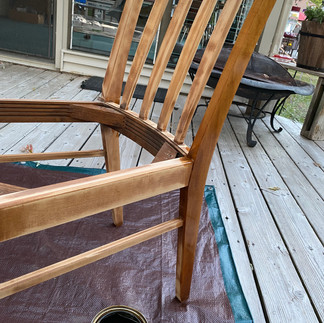
7. (Optional) Sand and/or clean the chair, before reattaching the seat. I used a sand block followed by a orbital sander to prepare mine (150 grit, followed by 220). I wasn't striving for a terribly uniformed look - just something fresh and clean.
8. After the stain/paint dries, reattach the seat. That's it! Easiest DIY, people!! Get yourself to the Restore and give an old chair new life to sit down and rest on!!
How do you plan to re-energize after a busy summer? I'm looking forward to have kids BACK at school and the schedule the school year demands! Any Fall projects you have on tap?? This weather is absolutely spectacular for an outdoor project!
.png)


Comments